Everyone needs a day when they treat themselves like a princess. Life is tough, you deserve it.
Summary
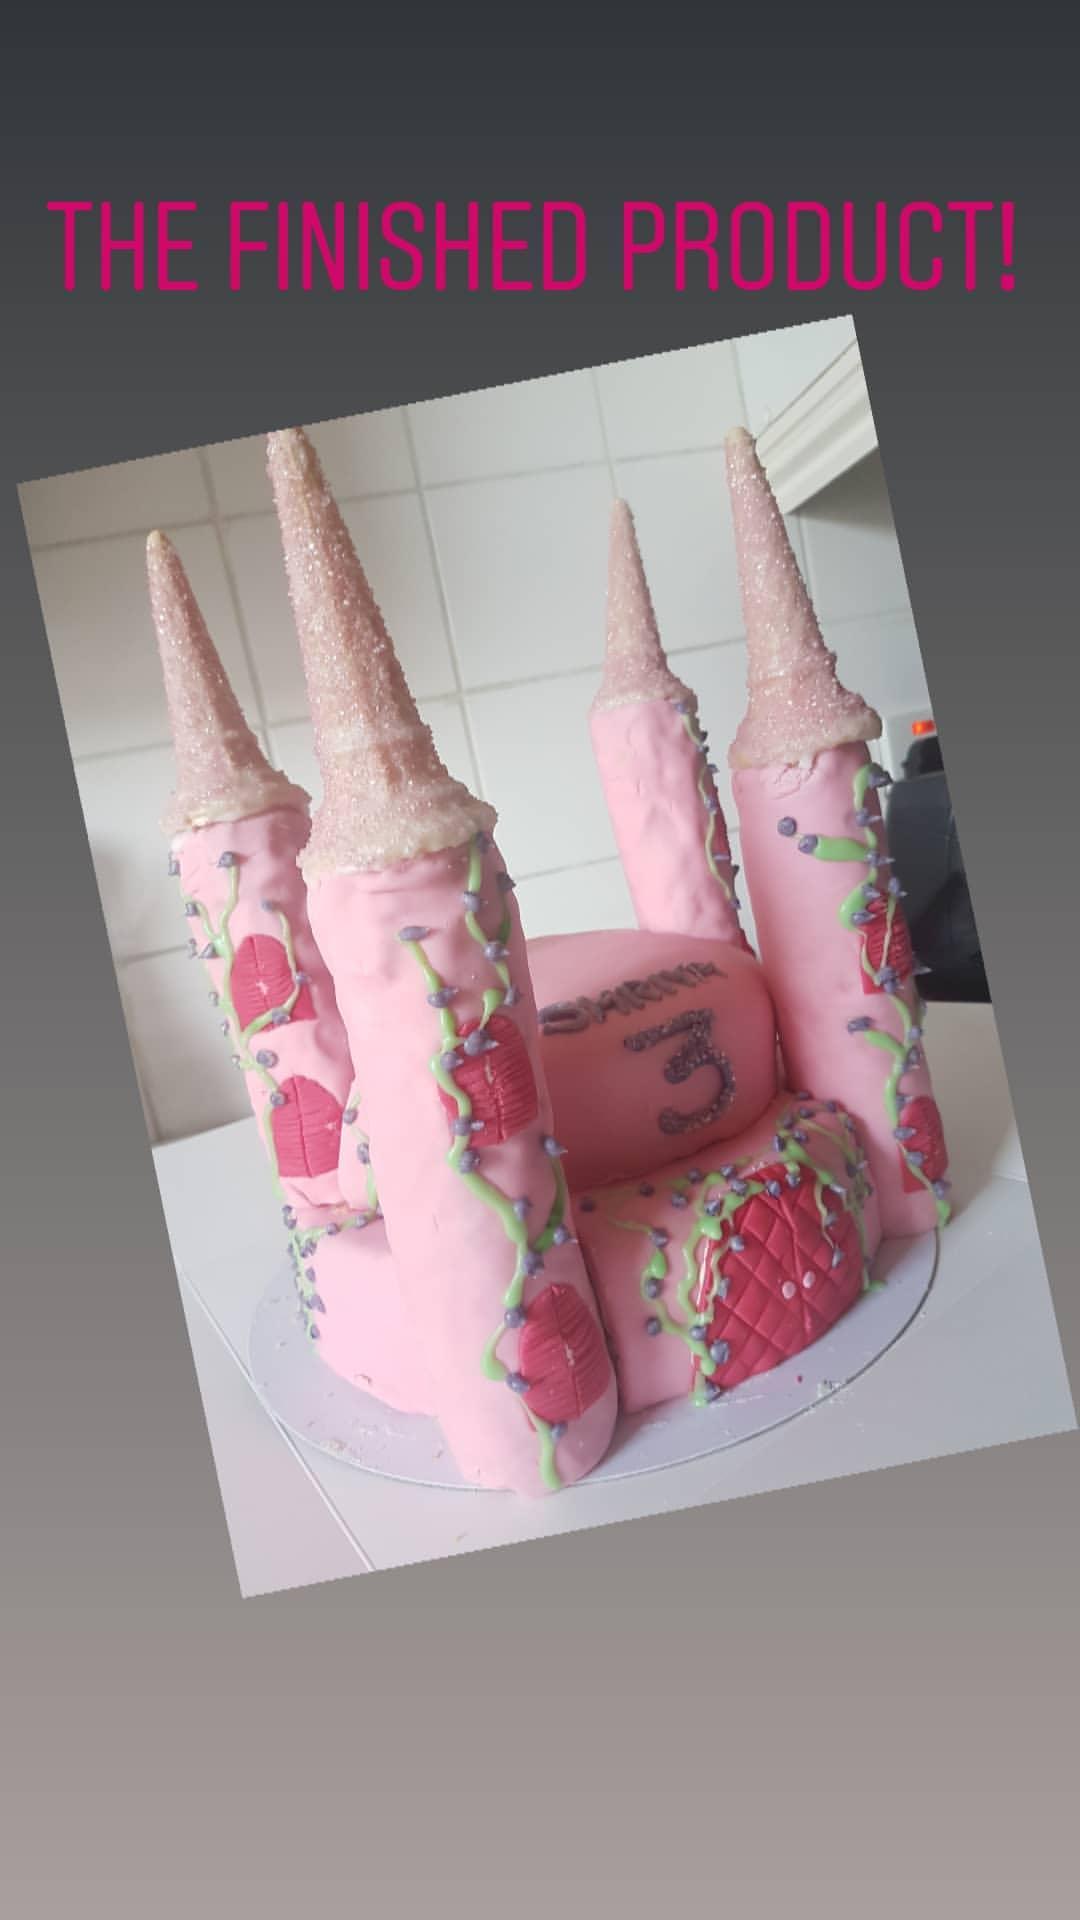
To create this castle, I spent a day in a world of castles, princesses, glitter and LOTS and LOTS of Pink!
Difficulty: Not as difficult as it looks, but takes some patience.
Time: 6 Hours on First Attempt, would be less with practice.

Ingredients
12 Inch Vanilla Sponge
335g Stork
335g Caster Sugar
335g SR Flour
3tsp Baking Powder
1.5 tsp Vanilla Extract
6 Room-temperature Eggs
8 Inch Vanilla Sponge
225g Stork
225g Caster Sugar
225g SR Flour
2tsp Baking Powder
1 tsp Vanilla Extract
4 Room-temperature Eggs
Rice Crispy Towers
45 Marshmallows
6 Cups of Rice Krispies (Own Brand work well, no need to buy Kellogg’s)
Vanilla Butter Cream
230g Room-temperature Unsalted Butter
480g Icing Sugar
2tbsp Milk
3tsp Vanilla Extract
Other Ingredients
1kg Box of Fondant Icing
Ice Cream Cones
Pink Edible Glitter
Pink, Purple & Green Food Colouring
Extra Icing Sugar
Method
12 Inch Vanilla Sponge
Found in Mary Berry’s Cookery Course Book
- Mix All ingredients in an electric mixer for circa 2 minutes.
- Split between two 12 Inch Cake Tins
- Bake at 180 Degrees for 30 minutes. But Check at 20 and 25 Minutes to see if a knife comes out clean.
8 Inch Vanilla Sponge
Found in Mary Berry’s Cookery Course Book
- Mix All ingredients in an electric mixer for circa 2 minutes.
- Split between two 8 Inch Cake Tins
- Bake at 180 Degrees for 20 minutes. Check to see if a knife comes out clean and leave in for an additional few minutes if it does not.
Rice Krispy Towers
Inspired by https://howtocakeit.com/products/sculpting-rice-krispie-mixture.
- Whilst cakes are baking prepare the Rice Krispie Towers.
- Melt marshmallows in a heat proof bowl, in 30 seconds bursts until marshmallows puff up.
- Stir Marshmallows until they are a fully melted consistency.
- Add Rice Krispies to melted Marshmallows.
- Mix until combined, either with a wooden/ plastic spoon or your hands. (Tip: covering your hands or spoon with butter stops the mixture sticking.)
- Lay cardboard (I used Cereal boxes) on the side with a piece of grease proof paper on top. Cover the grease proof paper with butter.
- Place half the mixture on the grease proof paper and roll to make a 20 inch tube.
- Wrap the tube in cardboard and tape to hold shape.
- Repeat steps 6-8 to create a second tube.
- Leave to set.
Vanilla Butter Cream
Inspired by https://www.twosisterscrafting.com/buttercream-frosting/
- Put all ingredients in an electric mixer and mix until fully combined. (Tip: Put a tea towel over the mixed to stop icing sugar covering the kitchen).
Construction
- Make sure all the cakes are cooled.
- Layer the 12 inch cakes with generous buttercream between each layer. Then crumb coat with butter cream.
- Layer the 8 inch cakes with generous buttercream between each layer. Then crumb coat with butter cream.
- Add food colouring to the 3/4 pack of fondant and keep mixing until there is consistent colour. Roll out dyed fondant and cover both the 12 inch and the 8 inch cake.
- Use Dowels in the 12 inch cake to allow it to support the 8 inch cake, when stacking the two cakes.
- Push Dowels through two of the four Rice Crispy Towers (The two you wish to sit on the top of the cake.
- Cover the Rice Crispy towers in buttercream and then wrap with remaining pink fondant.
- Add more pink colouring to remaining fondant to make a darker shade of pink. Make doors and windows to decorate the towers (I use buttercream to stick this fondant to the light pink fondant).
- Cover four Ice Cream cones in simple icing (icing sugar & water) and then dip the ice cream cones in pink glitter. Leave to dry before adding these to the top of the Rice Crispy towers to create the turrets.
- Carve two semi-circles out of the bottom cake to place two of the towers in and then push the Dowels from the other two towers in the desired position on the top cake.
